
Why Weather Station Placement Matters
Where you mount your weather station has a bigger impact on accuracy than the station itself. A professional-grade Davis Vantage Pro2 mounted in the wrong location will give you worse readings than a budget AcuRite mounted correctly. Placement is everything.
The National Weather Service has detailed siting guidelines for a reason. Temperature sensors mounted in direct sunlight read 5 to 10 degrees too high. Rain gauges placed near walls or trees catch wind-driven splash and miss rainfall entirely. Anemometers mounted below roofline level underreport wind speed by 20 percent or more. These aren’t minor errors. They compound into daily readings you can’t trust.
The good news is that most placement mistakes are easy to avoid once you know what to look for. Use the tool above to get placement recommendations tailored to your specific property.
The Four Sensors and What They Need
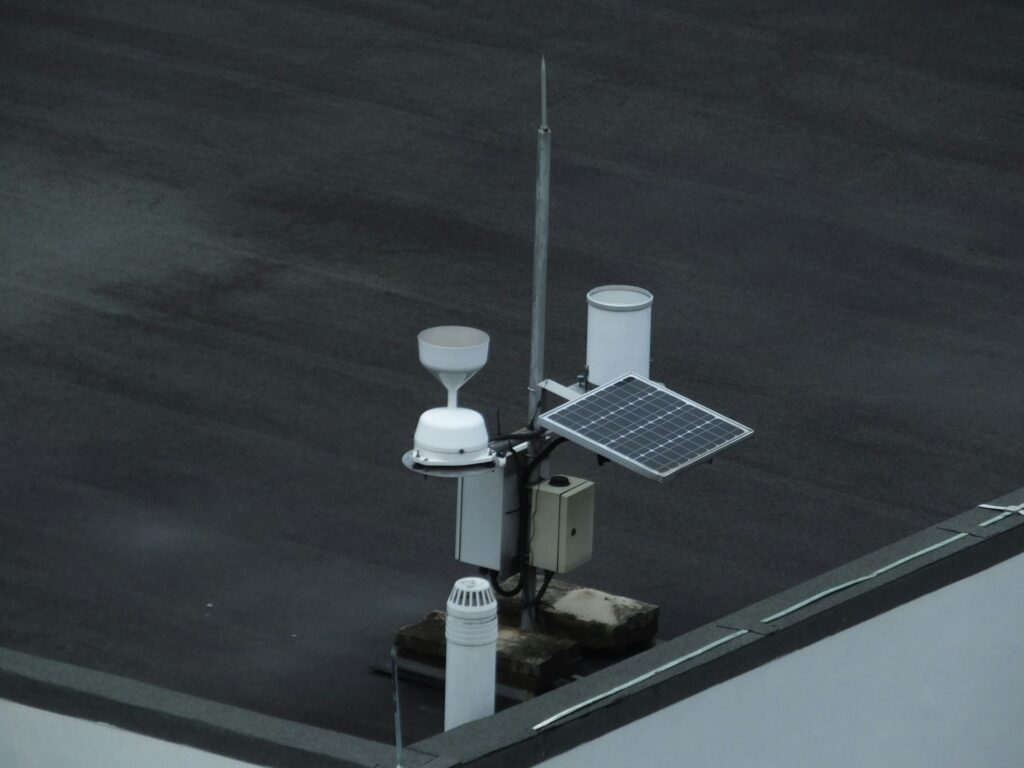
Most home weather stations measure four things: temperature and humidity, wind speed and direction, rainfall, and UV and solar radiation. Each sensor has different placement requirements and getting one wrong doesn’t necessarily affect the others.
Temperature and humidity sensors need shade, airflow, and distance from heat-absorbing surfaces. The north side of your home at 5 to 6 feet above ground is the gold standard. Direct sunlight on a temperature sensor is the single most common cause of inaccurate readings in home weather stations.
Anemometers need height and exposure. The official measurement height is 33 feet, but mounting above your roofline is a practical compromise that dramatically improves wind accuracy. Trees and buildings create turbulence that distorts readings for significant distances downwind.
Rain gauges need open sky and low placement. The rule of thumb is that any obstruction should be at least twice its own height away from your gauge. A 10-foot fence needs to be at least 20 feet away. High mounts near buildings create turbulent airflow that causes rain to miss the funnel entirely.
UV and solar radiation sensors need unobstructed sky exposure facing upward. Even partial shading during peak hours significantly reduces daily solar totals. Keep the sensor dome clean as dust and organic residue absorb UV and can cause readings to read 10 to 15 percent low.
Common Placement Mistakes to Avoid
Mounting temperature sensors on south-facing walls. South-facing walls absorb heat throughout the day and radiate it outward for hours after sunset. A sensor mounted here will read consistently high during the day and warm at night.
Placing the rain gauge under a tree or roof overhang. Tree canopy intercepts rainfall before it reaches the gauge, causing chronic underreporting. Roof overhangs cause splash-in during heavy rain, causing overreporting.
Mounting the anemometer on a short pole in a sheltered yard. Wind speed increases dramatically with height. A reading taken at 6 feet in a sheltered yard may be less than half the actual wind speed at roofline level.
Using alkaline batteries in cold climates. Alkaline batteries lose capacity rapidly below freezing. A battery that tests fine at room temperature may fail within hours in sub-zero conditions. Always use lithium batteries if you live in a cold climate.
Skipping the grounding wire. A weather station mounted on a pole at height is a lightning rod. Always run a grounding wire from the mounting pole to a ground stake. This applies especially to roof mounts.
Apartment and Urban Installations
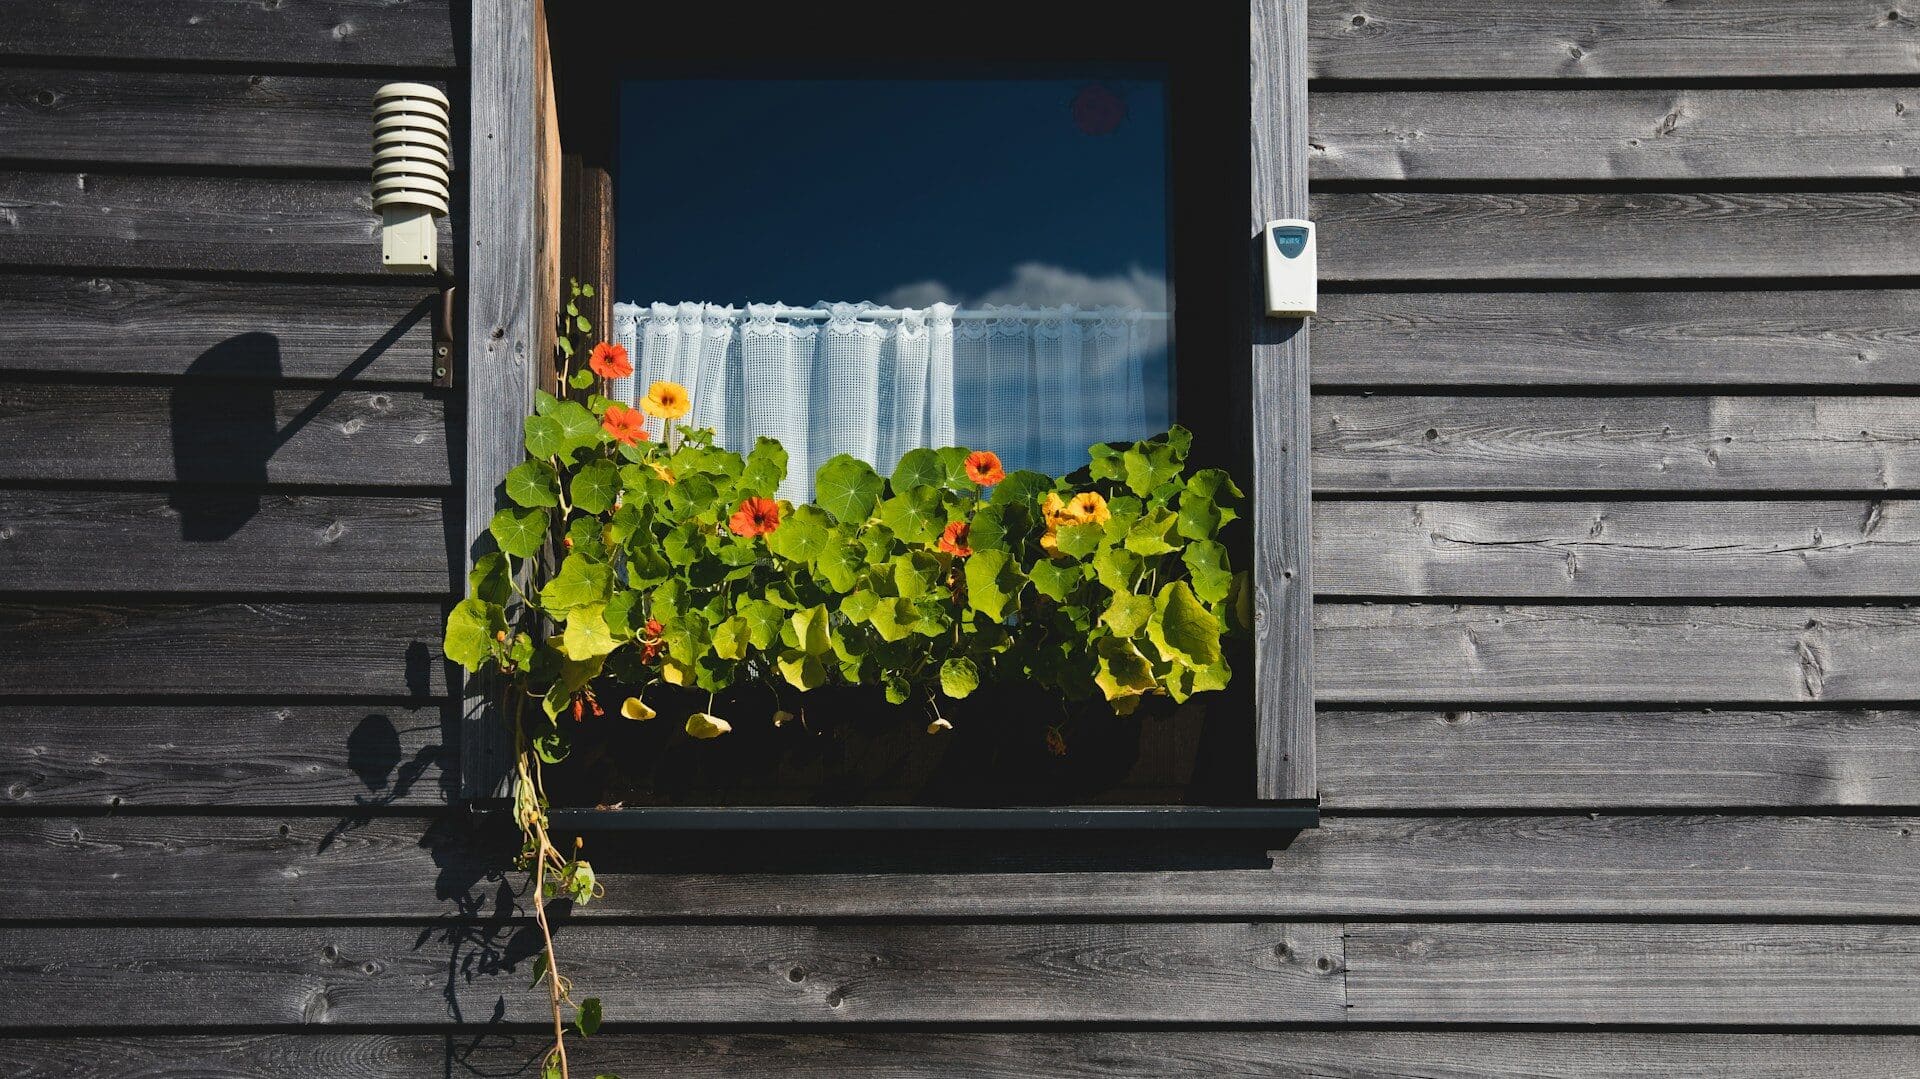
Limited outdoor space means you need to be strategic. Balcony mounts work well for temperature and humidity sensors as long as you avoid south-facing direct sun exposure and heat from the building structure.
Wind and rain readings are harder to get right in urban and apartment settings. Buildings create complex airflow patterns that make wind readings unreliable below roofline level, and rain gauges on balconies are heavily affected by building turbulence. Set realistic expectations for these measurements and use them for relative comparisons rather than absolute accuracy.
For apartment installations the Ambient Weather WS-2902C is our top recommendation. Its compact all-in-one sensor suite is easy to position and its WiFi connectivity means the console can be placed anywhere inside.
How to Test Your Placement Before Committing
Before drilling holes or running cables, test your chosen location. Most weather stations will show a signal strength indicator on the console. Walk the sensor to its planned location and confirm you’re getting a stable signal. Check the Weather Station Signal Range Predictor if you’re unsure whether your station will reach.
For temperature accuracy, compare your station’s readings against a calibrated reference thermometer placed in the same location for 48 hours before permanent installation. If readings are consistently high, you likely have a sun or heat source issue with your chosen spot.

Reviewed by Ed Oswald
Expert Reviewer, Weather Station Advisor
Ed has personally installed and tested every weather station model included in this tool across multiple home environments. He has covered consumer technology and weather instruments for Digital Trends, PC World, and the New York Times for over 20 years.
Read Ed’s full bio →